How to submit your site to Google Search Console?
Google Search Console (earlier called Google Webmaster) is a web service provided by Google itself. It helps webmasters to measure site’s performance in Google Search results and optimize their sites, e.g. finding search traffic on various pages, identifying keywords, fixing indexing issues, etc.
So, it’s a good idea to link your site with Google Search Console. In this article we will learn how to submit your site to Google Search Console.
To submit your site to Google Search Console, we need to follow these steps:
- Login with a Gmail account
- Get the tag from Google console.
- Add that code in your website.
Login with a Gmail account
Just login with Gmail account to Google Search Console.
Get your tag from Google console
You will need to select your property type. There are two options:
- Domain
- URL prefix
Using ‘Domain property type’ will include all subdomains (m, www etc.) and multiple protocols (http, https etc.), i.e. all your domains/subdomains will get verified in one go. This is what we are going to do.
If you use this property, you will only be given one method by which you can verify your site, i.e. via DNS verification.
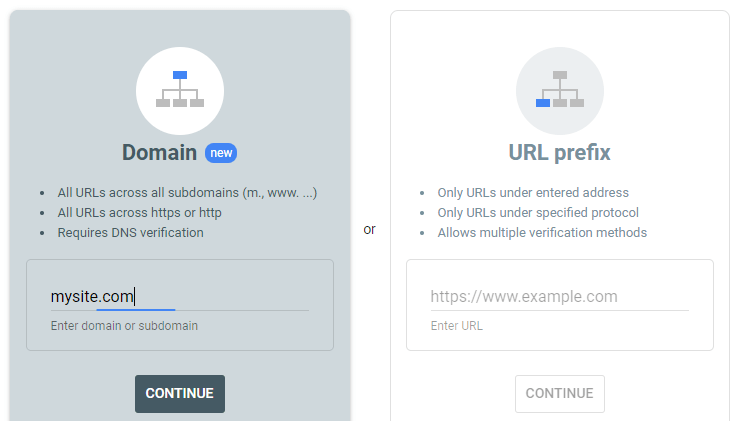
Now press ‘Continue’ and get the code from Google console.
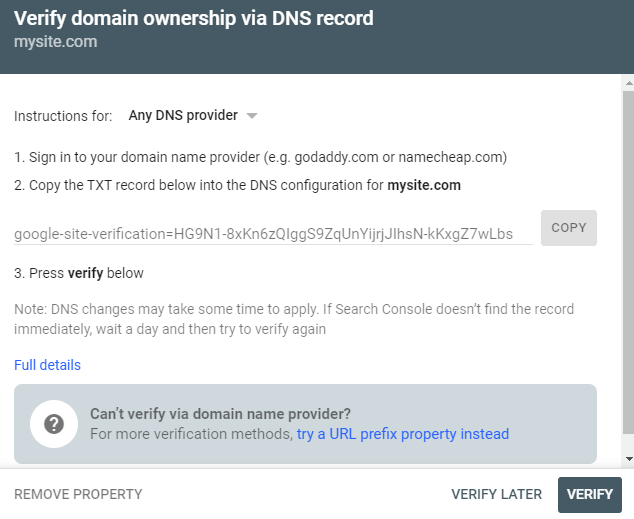
Don’t click the ‘Verify’ button as yet. We will come back and click ‘Verify’ button, once we submit the TXT record in our DNS provider.
Add TXT record in your DNS provider
In DNS verification method, we need not add any code or tag to our website code. Instead, we will add the TXT record provided by Google Search Console to the DNS provider of our website.
Your DNS provider maybe the site from where you bought your domain-name, e.g. Namecheap, GoDaddy etc. You will see the DNS settings in the Manage section of your domain-name.
However, if you have transferred the nameservers of your site from your Domain-name provider to your Hosting service, e.g. Bluehost or Netlify, then we will add our TXT record in our Hosting service account.
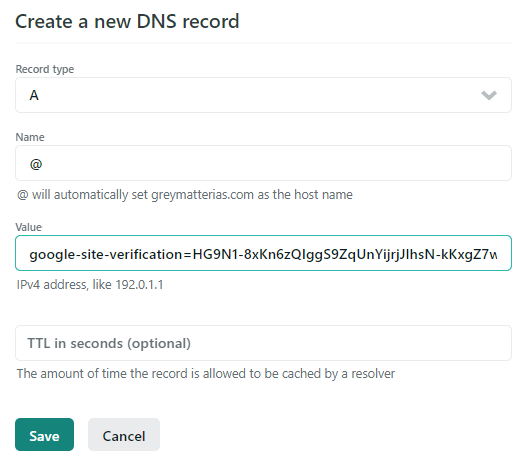
For example, as I had transferred the nameservers of my website from Namecheap account to Netlify, I added the TXT record of my site in Netlify.
How to add TXT record of Google Search Console in Netlify?
It’s pretty simple actually.
Go to Domains → Your website domain → DNS Settings
Then add new DNS record of TXT type:
Now go back to Google Search Console and click Verify:
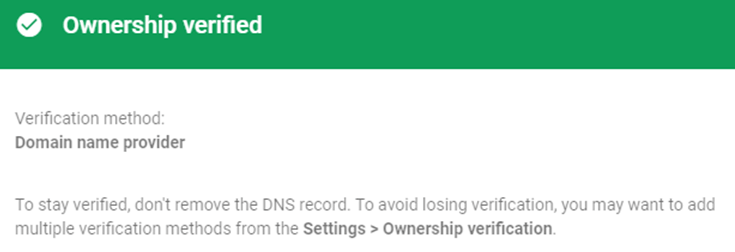
Congratulations! You have verified the ownership of your website in Google Search Console.
Now, let us explore some other options of verifying your website ownership. You may skip the rest of the article if you want to. We will just have a look at the other available options.
URL prefix property type
Give full URL of your site, i.e. with https and www. (in Domain property type we do not use https and www)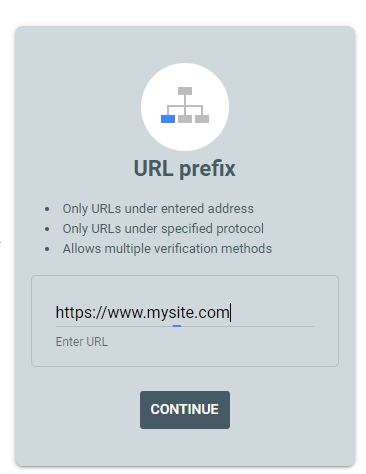
Now, you can use any of the given verification method. The following verification methods are available:
- We may verify via our DNS provider (this is what we did above when we made ‘Domain Property’)
- You may upload a HTML file
- We may add a meta tag to our site’s homepage
- We can also verify via Google Analytics or Google Tag Manager
You can also verify using more than one of the above methods to be doubly sure.
We will cover two methods here – meta tag method and HTML file method. We will showcase this using a Wordpress website, but we can do it in other types of websites (e.g. HUGO static websites) too.
Meta tag method
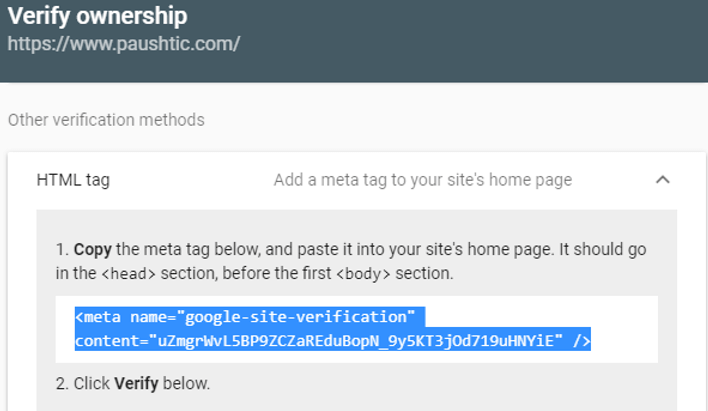
There are a couple of ways you can use this method. Let’s have a look at both of these options at our disposal.
You can use a plugin like Yoast, if your site is on WordPress. In Yoast plugin, take the HTML tag and paste it in the appropriate place. Save changes. Come back to search console and click Verify button. You are done. Your website is connected to Google Search Console.
You can also do it manually by adding the tag on your website in appropriate file. If your site is not on WordPress, then this is what you will do anyways.
In wordpress dashboard go to: Appearance → Editor → Click header.php
Paste the code inside the<head>tags.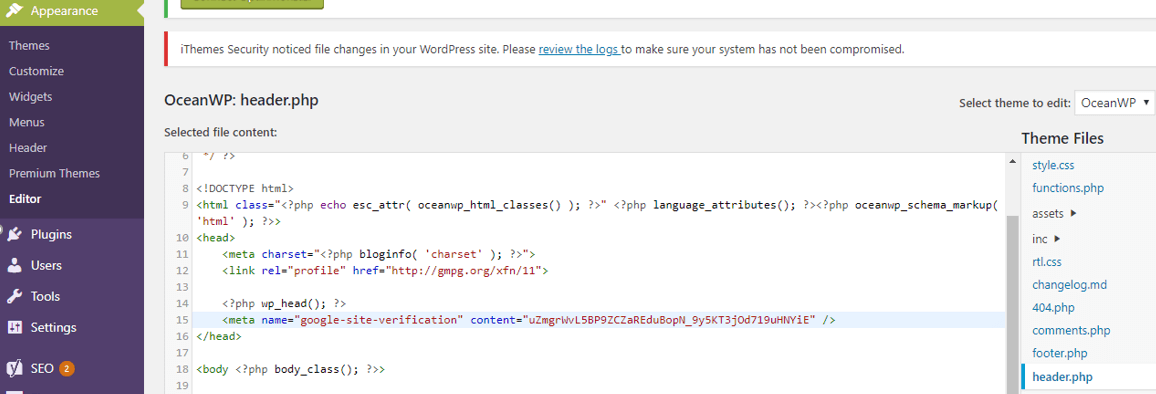
Update the file, go back to Google console and click Verify button.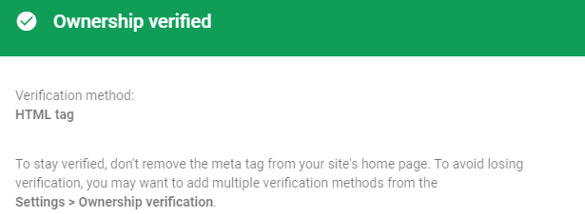
 Warning
I later found (after a month or so) that the header.php file has become the same as it was earlier and the meta tag that I had pasted was gone. Possibly, it was due to the theme update and the Google Console was asking me to verify the property AGAIN!!
So, LESSON LEARNT - Use some other method too, like the HTML file method as shown below. We can definitively use both to be doubly sure.
HTML file method
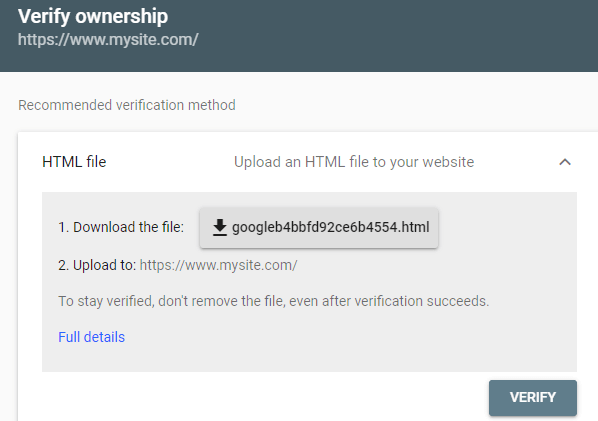
In this verification method, we need to upload the HTML file downloaded from Google Search Console to our website.
In case of WordPress, go to File Manager of your Hosting account and upload the HTML file in the root folder of the respective domain/subdomain.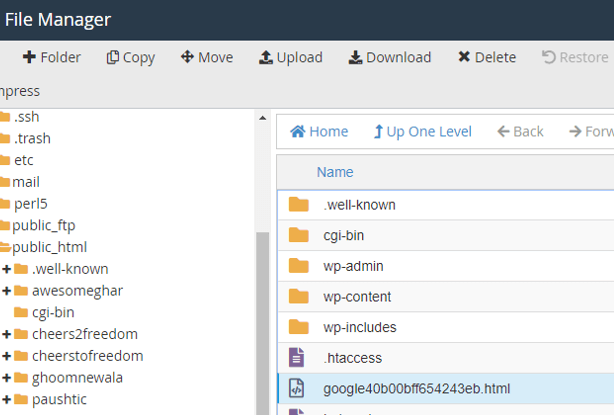
Now, go back to Google search console and click Verify button.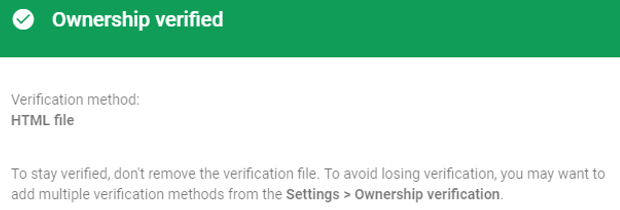
So, you can use these verification methods to verify the ownership of your site in Google Search Console. The method you choose will depend on the kind of website you have and your personal choice.
I personally prefer the DNS method, as it does not require me to do anything inside the file structure or code of my website. I guess, the Google Tag Manager method should be worth exploring too. You may also share with us the method that you prefer.
