Setting up Google Analytics Account
Google Analytics is the first service that comes to our mind when it comes to site monitoring. Whether you want to monitor the growth of the traffic to your website, further optimize your site or improve your lead generation, Google Analytics is the most dependable service. It’s a must!
 Note
NoteThere are other analytics tools too, e.g. adobe analytics, but most of them are paid options.
Setting up Google Analytics for your website is a three-step process:
- Step 1: Make a Google Analytics account using your Gmail id.
- Step 2: Then we will add our Property (website or app) to Google Analytics. When we make our Google Analytics account for the first time, we also add our first property at the same time. Later on we can add as many properties to the account separately, as we want.
- Step 3: Thereafter, we will link our Google Analytics Property to our website. The linking can be done directly by embedding the Google Analytics code in your website, or via Google Tag Manager. We generally prefer the ‘via Google Tag Manager’ method.
Let us see each of these steps in more detail.
Make a Google Analytics account
It’s pretty easy. Just login to Google Analytics using your Gmail id.
Press Set up for free

Set up your Account: Write Account name and press Next.
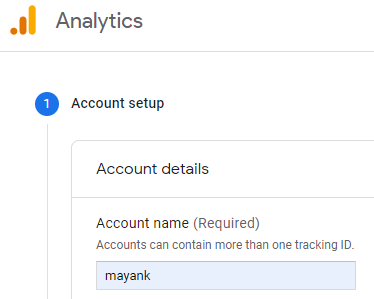
 Note
NoteYou may make Google Analytics account with the same Gmail id, with which you made or will make Google Adwords account, as we will be connecting them later.
 Note
NoteYou need not make a separate Google Analytics account for each website. You can add 100 websites to the same Google Analytics account. But if you wish to make a separate Google Analytics account for each website, you can. No one’s stopping you.
Add a Property to your Google Analytics account
A property can be a website or an app. You can add multiple properties in one Google Analytics account.
- Set up your Property: Write a proper Property name, select a proper Reporting time zone and Currency from the drop down. We can also change these property details later on.
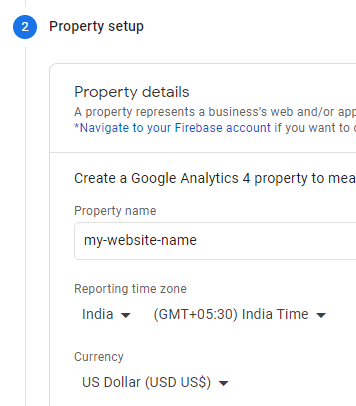
 Note
NoteIf later on you want to add another property to your account, then you will go to:
Admin → Create Property
 Google Analytics 4 property Vs. Universal Analytics property
Now, by default you will be making a Google Analytics 4 property in Google Analytics. Earlier we used to make Universal Analytics property. This is how Google Analytics used to look like a few years back:
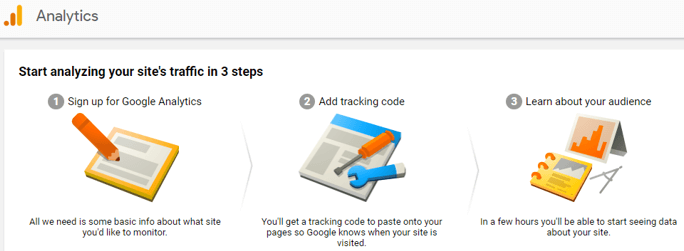 You can still make Universal Analytics property by switching on the slider button under “Show Advanced Options”. But Universal Analytics property is a part of an earlier version of Google Analytics. So, we do not prefer to use it anymore.
If you set up a Google Analytics 4 property with a Web data stream, you get a Measurement ID (which begins with “G-").
If you set up a Universal Analytics Web property (it will have views instead of data streams), you will get a Tracking ID (which begins with “UA-").
Provide Business Information: Select your industry type, business size and what all you need from Google Analytics.
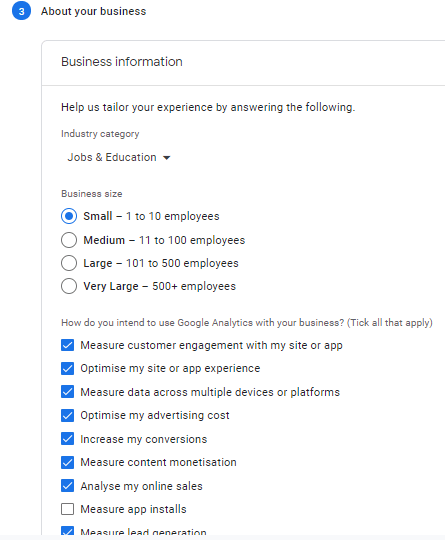
Now Create your Property.
When you will create the first property in your Google Analytics account, you will have to agree with Google Analytics’ Terms of Service Agreement and Google Measurement Controller-Controller Data Protection Terms. Choose your own country from the drop down before you do so.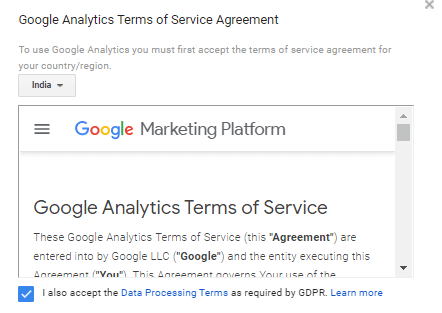
Set up a data stream for the Property
We need to set up a data stream for our property to start collecting data. Any given property can have multiple data streams, each coming from one platform. This data will be visible to you in your Google Analytics reports and analysis.
As we have a website, we will choose the Web platform.
Now, add your website URL (domain name) and Stream Name.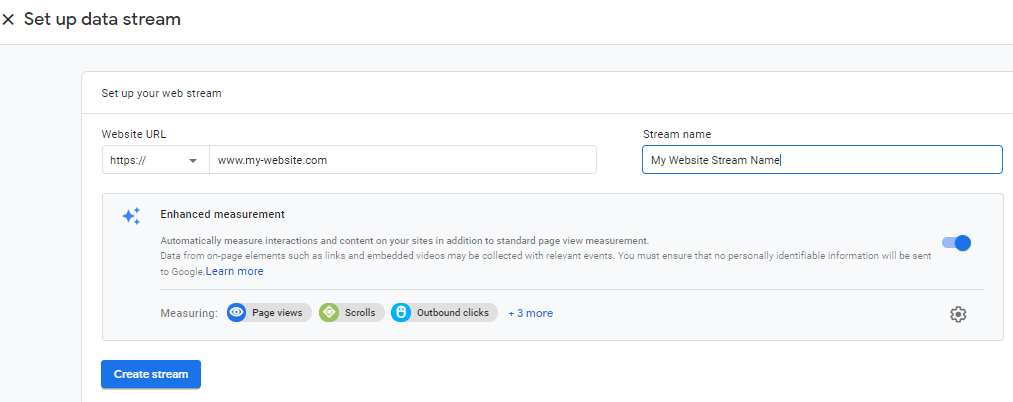
Click ‘Create stream’ button and you are done!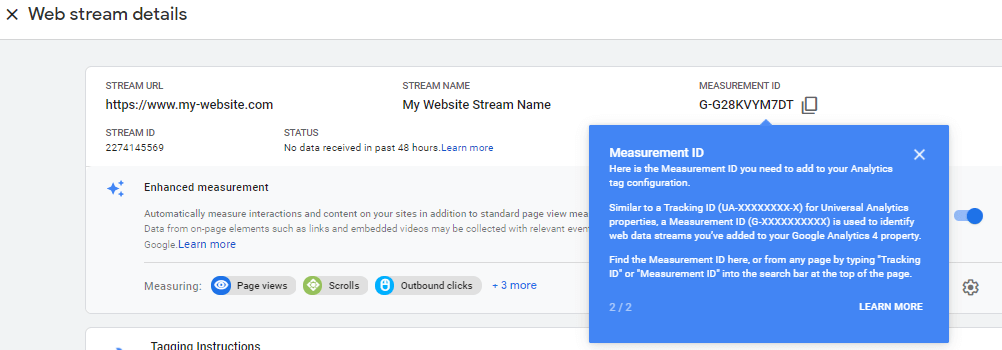
You can copy the Measurement ID for your website.
Linking Google Analytics with your Website
Earlier we used to add the Tracking ID of Google Analytics directly in our website. But nowadays we use Google Tag Manager for this purpose.
Instead of Tracking ID, we use Measurement ID. We add this to Google Tag Manager (rather than directly to our website). Then, we will add Google Tag Manager’s tag to our website. You will study about setting up your Google Tag Manager account and linking it with your Google Analytics property in this article.
Rather than adding the tags of different services in our website code, we add all the tags of other services to Google Tag Manager only. This way, we only add Google Tag Manager’s tag on our website and manage all other services (e.g. google analytics tag, Facebook pixels etc.) via Google Tag Manager. So, this way we can keep the code of our website clean.
 Note
NoteIn Academic (Wowchemy) theme of HUGO, you have both the options. But if you use both, then Google Analytics via Google Tag Manager will override the direct Google Analytics implementation. This is done to prevent tracking each user twice.
Exclude internal traffic from Google Analytics
Once you link your site with Google Analytics, it will start tracking each user that goes to your site, including you!
This will not only make your data impure, it may also increase bounce rate of your website, because we generally go to our website only to check the overall look and feel, for few seconds only. So, it’s essential that we exclude ourselves from the user activity data of Google Analytics. Luckily, there are various ways to do so:
Use Google Analytics’ inbuilt feature
You may go to your Google Analytics property and in the ‘Filter’ section enter the IP address of your computer. If you are using a WiFi then all the computers attached with that WiFi will have the same IP address. It’s the simplest method and provided by Google Analytics service itself.
However, as most of individuals and small organizations use dynamic IP address (rather that static IP address), it will change every two weeks or so. So, we will have to keep updating our IP address in Google Analytics.
For more on this method, you may read the following articles:
Google Analytics Article
Meeum website articleSwitch-off internet connection
It’s pretty simple. If you have a website that you can run and check on your own computer (localhost), then you can just switch-off the WiFi connection of your computer while you are running your website on your browser.
For example, if you have a HUGO website or Angular/Ionic website, then before pushing your changes to the Github or Hosting provider, you may check it out in localhost. However, if you have a WordPress or Blogger website, this is not an option. As in WordPress and Blogger you work directly on your live website. In case of static sites like HUGO, the website is right there on our computer.Other Methods
There are many other methods available too, that you may explore. For example, you can also use cookies or localStorage in your browser to stop the Google Manager Tag or Google Analytics Tag from sending the user activity data to Google Analytics, or you may use a Chrome Extension.
Keep in mind that, if you are using cookies method, then your settings will be lost once you delete the cookies in your browser. So, using localStorage method may be a better option than using cookies.
You may read further about these methods in the following article:
daniloaz website article on 5-ways-to-exclude-your-own-visits-from-google-analytics
